7 Tips for Choosing a Semi Auto Flute Laminating Machine

Time:2026-11-06 Author:Sophia
0%

A Semi-auto Flute Laminating Machine can shape production quality long before a finished carton reaches the packing line. The right choice affects bonding consistency, sheet alignment, operator workload, and daily output. Small details matter: a stable feeder, accessible glue controls, and adjustments that do not require repeated trial runs.

Smithers’ report, The Future of Global Packaging to 2028, describes a global packaging market worth more than US$1 trillion. That scale makes equipment selection a practical investment decision, not just a search for the lowest purchase price. Still, broad packaging forecasts do not measure demand for semi-automatic flute laminators specifically. Buyers should compare claims with machine trials, documented specifications, and references from plants handling similar board grades and formats.

One point needs care: I could not verify a published, machine-specific quotation from a named industry expert, so I will not invent one. That gap is worth acknowledging. A supplier’s sales claim is not independent evidence. Before choosing, inspect real production samples, check changeover steps, and ask how the machine performs across a full shift—not just during a brief demonstration. The following seven tips focus on those checks, helping buyers assess capacity, precision, usability, service support, and total operating cost with clearer expectations. A perfect machine on paper may still disappoint on a busy factory floor.
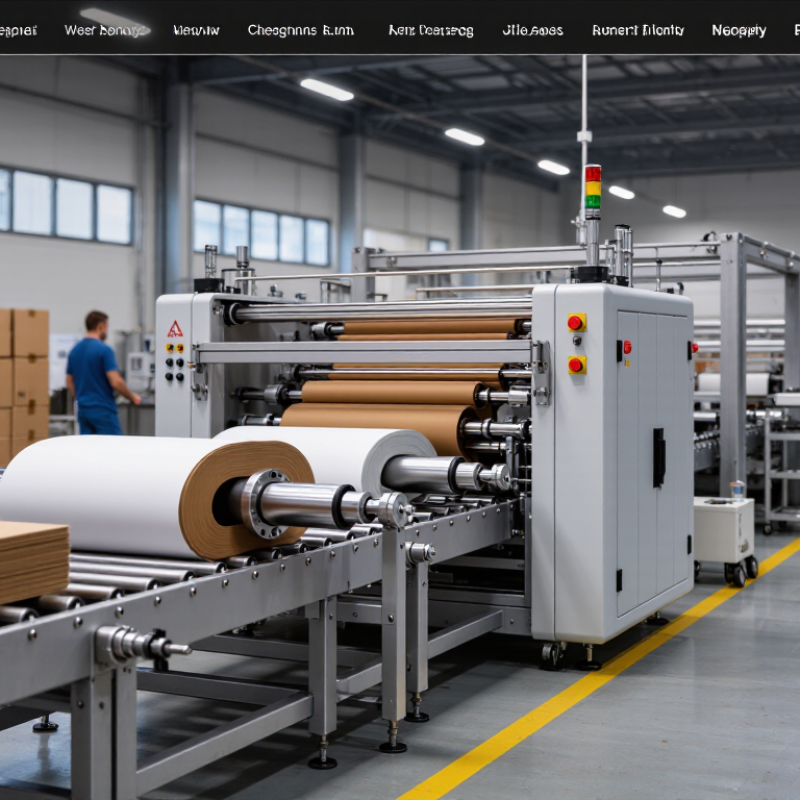
7 Tips for Choosing a Semi Auto Flute Laminating Machine

Select for Flute Profile: E, B, and C Flutes Measure About 1–4 mm

Choosing a semi-auto flute laminating machine starts with the board profile, not the advertised speed. E-, B-, and C-flute boards commonly measure about 1–4 mm thick, but actual caliper varies with liners, moisture, and production tolerances. Nominal flute labels are useful, not precise measurements. Measure a sample stack with a caliper. Small differences matter.

Tip: Ask for a trial using your own E-, B-, and C-flute boards. Watch where the top sheet meets the corrugated board. Check for crushed flute tips, shifted edges, and glue squeeze-out. A clean first sheet proves little. Run several sheets, including one with a slightly uneven edge.

For profiles around 1–4 mm, confirm the machine’s adjustment range and supported board thickness before purchase. Check how easily operators can adjust roller gap, pressure, and feed guides between jobs. Excessive pressure may flatten C-flute, even when the same setting works for E-flute. Keep a setup note for each board grade. It helps, though a liner change can make yesterday’s settings unreliable.

Match Sheet Dimensions and Board Caliper Using ISO 534 and ISO 536

Before choosing a semi-auto flute laminating machine, measure the largest sheet you actually run, not just the nominal size on a job ticket. Check length and width at several points; trimmed edges can vary. Then compare those figures with the machine’s usable feed area and side-guide range. ISO 534 provides a method for measuring paper and board thickness, while ISO 536 measures grammage in grams per square metre. They describe different properties. Do not use grammage as a substitute for caliper. FAO’s 2022 Forest Products Yearbook reports global paper and paperboard production of roughly 401 million tonnes, a reminder of the scale and variety of grades converters may handle.

Test your actual board. Flute profile, moisture, and compression can change how a sheet behaves, even when its caliper reading appears acceptable. A caliper that is too high for the machine’s adjustment range can cause uneven pressure; too low, and bonding may suffer. Check the stated working range, then run samples at the thinnest and thickest ends of your production mix. Keep the readings and settings beside the machine. A neat ISO measurement helps, but it cannot capture every shop-floor variation. That part is easy to underestimate.

Compare Rated Throughput, Setup Time, and Changeover Requirements

A semi auto flute laminating machine should be judged by its rated throughput and by the conditions behind that figure. Ask whether the rate assumes a specific sheet size, flute profile, and operator skill level. Then compare it with your typical shift, not just a short test run. A machine rated for 1,200 sheets per hour may deliver less when sheets need careful alignment or frequent inspection. Ask for a sample run using your own board.

Setup time affects how much of each shift is available for production. Check how long operators need to set guides, adjust pressure, and verify glue application when moving between common sheet sizes. Record the time from the last good sheet of one job to the first acceptable sheet of the next. Small adjustments add up. A supplier’s estimate may not include cleaning or trial sheets, so clarify what the number covers.

Changeover requirements matter most when orders vary. Look for accessible adjustment points and clear settings that operators can repeat without guesswork. Confirm which changes need tools, how many people are required, and whether flute or board changes call for a fresh setup. Keep a simple changeover log during trials. It may feel tedious, but it reveals where time actually goes. One overlooked detail: a faster rated cycle is not useful if downstream stacking cannot keep pace.

Assess Adhesive Control, Bond Quality, and Sheet-Registration Accuracy

When evaluating a semi auto flute laminating machine, watch how it applies adhesive across the full sheet. A thin, even film matters more than a fast cycle. Check the roller surface for dry streaks, then inspect the board for glue pooling or squeeze-out. These marks can point to uneven pressure, incorrect adhesive flow, or a setup that needs adjustment. Small shifts matter.

Bond quality needs more than a quick glance. After the adhesive has had time to set, cut a few samples from different areas of the sheet. Look for clean separation, weak corners, or flute crush near the edges. A clean first sheet can be misleading. Board moisture, adhesive temperature, and operator adjustments may change results during a longer run. Record the conditions, even when they seem routine.

Sheet-registration accuracy affects trimming and downstream printing. Feed several sheets and compare their leading edges against a fixed guide or reference mark. Watch for skew, side drift, and variation between the first and last sheets. Check it again. A common weakness in a short machine trial is testing only one board size. Ask for a longer run using representative stock, and note where corrections are needed. Perfect alignment may not hold across every material, so repeatability is the practical measure.

7 Tips for Choosing a Semi-Auto Flute Laminating Machine

Compare key buying considerations, including adhesive control, bond quality, and sheet-registration accuracy.

Illustrative buyer-priority ratings on a 1–5 scale, not measured performance data or an industry benchmark. Verify machine capabilities with sample sheets and production trials.

Verify Machine Guarding, Emergency Stops, and Electrical Specifications

When evaluating a semi auto flute laminating machine, inspect every pinch point around the feed rollers, pressure section, and delivery area. Fixed or interlocked guards should prevent access during operation. An emergency stop should be easy to reach from the operator’s normal position and stop hazardous motion. Test it during acceptance checks, not only at startup. A BLS report recorded 5,486 fatal work injuries in the United States in 2022, including 738 involving contact with objects or equipment. These figures cover all industries, not laminating machines specifically, but they reinforce the value of checking physical safeguards. Source: U.S. Bureau of Labor Statistics, Census of Fatal Occupational Injuries, 2022.

Tips: Ask the supplier to demonstrate each guard and emergency stop. Confirm the stop resets manually and does not restart the machine by itself. Check access points with the machine in its normal operating setup; a guard can look adequate while leaving a reach-in gap. Keep a written record of test results and any unresolved issues.

Match the electrical nameplate to the site supply: voltage, phase, frequency, and full-load current. Have a qualified electrician verify grounding, disconnecting means, and protective-device ratings against the machine documentation and local requirements. Check that cables and control panels are protected from dust, adhesive residue, and accidental impact. A checklist helps, but it can miss awkward real-world access. Recheck after installation.

7 Tips for Choosing a Semi Auto Flute Laminating Machine - Verify Machine Guarding, Emergency Stops, and Electrical Specifications

Tip What to Verify Practical Checkpoint Information to Record
1. Inspect guards around nip points Check feed rolls, pressure rolls, belts, chains, gears, and other accessible moving parts for fixed guards or suitable interlocked guards. Guards should prevent access to hazardous moving parts during normal operation. Confirm that any interlocked guard stops or prevents hazardous motion when opened, as designed. Guard locations, access points, and interlock test results.
2. Check access to the infeed and work area Assess where operators load sheets, align flute board, clear jams, and retrieve laminated material. Look for reachable pinch points and unexpected access from the sides or rear. The intended operating position should not expose workers to unguarded hazards. Confirm that jam-clearing and adjustment procedures specify safe isolation where required. Operator positions, hazard locations, and access-control measures.
3. Test emergency-stop devices Locate each emergency stop and verify its visibility, accessibility, latching action, and reset method. Ask the supplier to demonstrate the stop function. The machine should stop hazardous motion when an emergency stop is actuated. Resetting the device should not, by itself, restart the machine; restart should require a separate deliberate action. Device locations, functions tested, and reset/restart behavior.
4. Match electrical supply to the facility Compare the machine nameplate and wiring documentation with the site supply, including voltage, phase, frequency, full-load current, and any required neutral or protective earth. The documented machine requirements must be compatible with the available supply. Do not assume a standard voltage or frequency; confirm the exact configuration before purchase and installation. Nameplate values and verified site-supply values.
5. Review electrical protection and isolation Check the electrical documentation for overcurrent protection, protective bonding/earthing, disconnecting means, control-circuit protection, and lockout provisions. Protection and isolation arrangements should be suitable for the machine and installation, and accessible for inspection and maintenance. Confirm installation requirements with a qualified electrician. Disconnect location, protection details, and installation requirements.
6. Verify controls and restart behavior Test start, stop, mode selection, and any setup or inching controls. Check what happens after a power interruption, guard opening, or emergency stop. Controls should operate as described in the manual. A power restoration or safety-device reset should not cause an unexpected automatic restart. Control functions tested and observed restart behavior.
7. Review documentation and acceptance testing Request the operating and maintenance manuals, electrical drawings, safety-device information, and documented inspection or functional-test procedures. Before acceptance, document tests of guards, interlocks, emergency stops, and electrical functions. Use applicable local regulations and recognized standards as references; suitability depends on the machine and installation. Documents received, test dates, results, and open actions.

Note: This checklist is for equipment evaluation and does not replace a site-specific risk assessment, the machine manufacturer’s instructions, or applicable local safety and electrical requirements.

FAQS

How should I check sheet size before choosing a laminating machine?

Measure the largest sheets you actually run, not only the job-ticket size. Check length and width at several points. Compare them with the usable feed area and side-guide range.

Are grammage and board thickness interchangeable measurements?

No. Grammage measures weight per square metre; caliper measures thickness. Check caliper using an appropriate thickness-measurement method. They describe different properties.

How can I tell whether the machine handles my board thickness?

Confirm the stated working range, then test your thinnest and thickest boards. Flute profile, moisture, and compression can affect feeding and bonding. Keep sample readings and settings nearby.

Does rated throughput show what I will produce per shift?

Not by itself. Ask which sheet size, flute profile, and operating conditions the rating assumes. Run your own board and compare results over a typical shift.

What should I include when measuring setup time?

Time guide adjustments, pressure checks, glue verification, cleaning, and trial sheets. Record the gap between the last good sheet and the first acceptable sheet. Small details matter.

How can I compare changeover requirements between jobs?

Check which adjustments need tools, how many operators are needed, and whether board changes require a fresh setup. Keep a simple changeover log. It may feel tedious, but it shows where time goes.

What safety features should I inspect during machine checks?

Inspect guards around feed rollers, the pressure section, and delivery area. Test accessible emergency stops during acceptance checks. Confirm the machine does not restart automatically after a stop. Still, awkward access can be easy to miss.

Which electrical details should I verify before installation?

Match voltage, phase, frequency, and full-load current to the site supply. Have a qualified electrician check grounding and protective devices against machine documentation and local requirements. Recheck after installation.

Conclusion

Choosing the right Semi-auto Flute Laminating Machine starts with matching it to the flute profile and board materials you handle. E, B, and C flutes are typically about 1–4 mm thick, so check that the machine can accommodate your chosen profile, sheet dimensions, and board caliper. Use ISO 534 for paper and board thickness measurements and ISO 536 for grammage where relevant, helping you compare material specifications consistently.

Next, evaluate practical performance and operating needs. Compare rated throughput with setup time and the frequency of job changeovers, then assess adhesive control, bond consistency, and sheet-registration accuracy. These factors influence finished quality as well as production efficiency. Before making a decision, verify that the machine has suitable guarding and accessible emergency stops, and confirm its electrical specifications are compatible with your facility. A careful review of these criteria can help you select equipment suited to your materials, workload, and operating environment.

Sophia

Sophia

Sophia is a dedicated marketing professional with an exceptional depth of knowledge about her company's products and services. With a keen understanding of market trends and customer needs, she crafts insightful blog posts that not only inform but also engage readers, enriching the company’s online......

有兴趣合作?

给我发一封邮件,我会尽快回复你。

发送邮件