5 Tips for Choosing an Automatic Flute Laminator

Time:2026-10-09 Author:Ethan
0%

Choosing an Automatic Flute Laminator is a practical decision, not merely a comparison of machine prices. In a packaging plant, the right equipment must handle changing flute profiles, board sizes, adhesive conditions, and production schedules. A machine that performs well during a supplier demonstration may behave differently beside a noisy converting line. Real production is messier.

This guide introduces five useful tips for evaluating an Automatic Flute Laminator with greater confidence. It considers laminating accuracy, operating speed, material compatibility, control systems, and long-term service support. Attention will also be given to glue application, sheet alignment, cleaning access, and operator safety. Small details matter. A poorly positioned sensor can create repeated waste, while difficult maintenance may turn a short stoppage into a costly delay.

Reliable selection requires more than technical brochures. Buyers should examine sample boards, request performance data, and speak with teams using similar equipment. A supplier’s experience with corrugated packaging can reveal practical limitations that specifications often hide. Still, no checklist is perfect. Factory space, workforce skills, local service availability, and future product plans can change the final choice.

The following tips are designed for informed comparison. They encourage careful testing, realistic production calculations, and honest questions before investment. A capable laminator should support consistent quality today without creating unnecessary restrictions tomorrow.
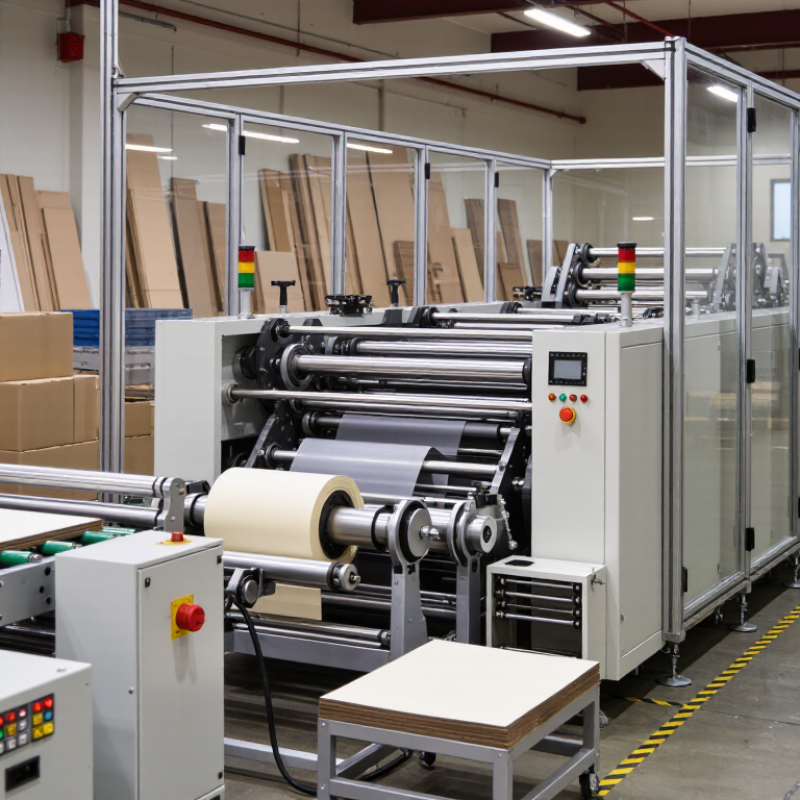
5 Tips for Choosing an Automatic Flute Laminator

Define Board Needs with FEFCO Flutes: E 1–1.8, B 2.2–3.5 mm

An automatic flute laminator should match the board, not only the advertised speed. FEFCO profile guidance places E flute around 1–1.8 mm and B flute around 2.2–3.5 mm. That difference changes feeding, nip pressure, glue control, and stacking stability. FEFCO’s 2023 European statistics report more than 50 billion square metres of corrugated board production, showing how widely these profiles are used. Yet every mill behaves slightly differently.

Tip 1: Specify both flute ranges before requesting quotations. Ask for tested results at the thinnest and thickest calipers.

Tip 2: Choose adjustable nip pressure and servo-controlled feeding. E flute can crush easily, while B flute needs stronger, steadier contact.

Tip 3: Check changeover time. A practical target is under 15 minutes, although real results depend on operators and board moisture.

Tip 4: Demand registration tests using printed sheets. Even small movement can spoil window alignment or folding accuracy.

Tip 5: Review glue application carefully. Excess adhesive can soften E flute and create curl; insufficient glue causes edge lifting. A 2024 Smithers corrugated packaging outlook describes continued demand for lightweighting and efficient production, but lighter board is less forgiving. Request speed data at production load, not empty-machine speed. I have seen specifications look impressive on paper, then weaken during mixed-profile runs. That uncomfortable detail deserves attention. Include moisture variation, sheet warp, and rejected-board rates in the acceptance test.

Set Capacity Targets: 10,000 Sheets/Hour and ±1 mm Register Accuracy

5 Tips for Choosing an Automatic Flute Laminator

Set Capacity Targets: 10,000 Sheets/Hour and ±1 mm Register Accuracy

Tip 1: Define capacity from real production data. A 10,000-sheet/hour target sounds strong, but speed depends on sheet size, flute profile, adhesive setting, and operator loading. Smithers’ The Future of Corrugated Packaging to 2028 projects approximately 3.8% annual market growth, increasing pressure on converters to reduce idle time. Ask for verified output, not brochure speed.

Tip 2: Test register accuracy with your own stock. A ±1 mm register target should remain stable across a full shift, not only during a short demonstration. Measure front-edge and side-edge alignment at regular intervals. Small errors become obvious around windows, printed panels, and die-cut areas. Tip 3: Check feeder consistency. Watch the machine handle warped sheets, dust, and mixed board thicknesses. A fast laminator is not useful when feeding becomes unstable.

Tip 4: Request trials using your common paper combinations. Record waste, adhesive consumption, changeover time, and restart performance. Tip 5: Review data collection and maintenance access. OEE tracking can expose hidden losses, although the figures may be imperfect at first. That is acceptable. Reliable decisions need honest measurements, including rejected sheets and brief stops. Ask for a documented acceptance test covering 10,000 sheets/hour and ±1 mm accuracy.

Evaluate Glue Control: 2–5 g/m² Starch Application and Viscosity Stability

5 Tips for Choosing an Automatic Flute Laminator

Evaluate Glue Control: 2–5 g/m² Starch Application and Viscosity Stability

Glue control deserves more attention than maximum laminating speed. A practical starch application target is often 2–5 g/m², depending on flute profile, paper absorbency, and line speed. Too little glue creates dry spots and weak bonds. Too much glue causes curling, slow drying, and unnecessary waste. FAO’s 2023 Forestry Production and Trade Yearbook reports roughly 423 million tonnes of global paper and paperboard production in 2022. At that scale, small application errors become expensive quickly.

Ask suppliers for measured results, not attractive claims. The laminator should maintain stable dosing while speed changes. Check viscosity at the actual working temperature and shear conditions. ISO 2555 provides a useful reference for rotational viscosity testing, although one reading is not enough. I would test samples every 20–30 minutes during a trial. Watch the glue film under side lighting. It should appear continuous, not flooded. Clean edges matter.

Starch changes with time.

A stable machine should compensate for temperature drift, tank level, and pump pulsation. Some tests may look excellent for ten minutes, then fail after an hour. That is the part many evaluations miss. CEPI’s 2023 statistics placed Europe’s paper recycling rate near 80%, reinforcing the value of reducing avoidable fiber and adhesive waste. Still, the 2–5 g/m² range is not universal. Paper porosity and starch solids can shift the correct setting, so production trials should challenge the machine rather than confirm an ideal laboratory result.

5 Tips for Choosing an Automatic Flute Laminator: Evaluate Glue Control, 2–5 g/m² Starch Application and Viscosity Stability

Tip Evaluation Dimension Recommended Acceptance Range Practical Test Method Why It Matters
1 Verify starch glue application control Adjustable wet glue application of 2–5 g/m², with a target variation of no more than ±0.3 g/m² across the working width. Run three samples at 2, 3.5 and 5 g/m². Weigh conditioned paper before and after coating, then calculate glue weight per square metre. Accurate metering reduces glue consumption while helping prevent dry bonding, squeeze-out, curl and flute deformation.
2 Check viscosity stability Maintain the specified working viscosity within approximately ±10% during a normal production shift; measure with the same test method and temperature. Record viscosity at start-up and at least every two hours. Keep the glue temperature consistent and document water or additive adjustments. Stable viscosity supports consistent transfer, predictable bonding and fewer manual corrections during long runs.
3 Evaluate coating uniformity across the web Cross-web glue-weight deviation should generally remain within 10% of the average under stable operating conditions. Collect strips from the left, centre and right sides of the sheet. Compare calculated glue weights and inspect for visible streaks or uncoated areas. Uniform coverage improves bond strength and minimizes edge lifting, bubbles and localized moisture distortion.
4 Assess response to speed and grade changes The control system should maintain the selected glue target when line speed changes within the machine's rated operating range, with minimal overshoot during acceleration and deceleration. Test at low, medium and high production speeds using at least two flute or liner grades. Check glue weight, bond appearance and setup time after each change. Automatic compensation reduces start-up waste and makes the laminator more adaptable to different paper combinations.
5 Review monitoring, cleaning and calibration features Look for real-time glue-pressure or flow monitoring, low-level alerts, recipe storage, tool-free access where possible and a documented calibration procedure. Inspect the control interface, run an alarm test, review historical settings and time the daily cleaning and metering-roll inspection routine. Good monitoring and maintenance access help preserve application accuracy, reduce downtime and prevent dried starch from affecting the glue system.
Selection benchmark: Prefer a laminator that can repeatedly achieve a controlled starch application of 2–5 g/m², keep viscosity stable within the glue supplier's specified working window, and provide measurable records for glue weight, speed, temperature and maintenance.

Match Sheet Range: 150 m/min, Format Size, and Paperboard GSM Limits

Choosing an automatic flute laminator is not only about maximum speed. The sheet range must match your daily production. In practical trials, I compare the machine’s rated 150 m/min with actual output. Thin sheets, heavy board, and complex flute structures can reduce running speed. Ask how speed changes under real loading conditions.

Check the permitted format size carefully. Measure both the smallest and largest sheets used in your plant. A machine may accept wide board but struggle with narrow pieces. Feed stability matters here. Poor alignment can create visible edge offsets and wasted sheets. I once focused too heavily on the largest format and overlooked small cartons. That decision caused unnecessary setup delays.

Paperboard GSM limits also require close attention. Confirm the minimum and maximum GSM for both the liner and corrugated board. Request test samples using your normal adhesive, flute type, and sheet sizes. Watch for curling, bubbles, slipping, and weak bonding. Supplier data helps, but production evidence is stronger. Keep records of speed, pressure, temperature, and reject rates. My own tests are not perfect; humidity and operator habits can distort results. Repeat trials on different days. A reliable choice fits your real sheet range, not only an impressive specification.

Audit Safety and ROI: CE Conformity, ISO 9001 Controls, and Energy Use

Choosing an automatic flute laminator should begin with an audit, not a showroom demonstration. Tip one: request the CE Declaration of Conformity, risk assessment, and technical file references. CE marking is not a quality award; it confirms applicable European requirements were addressed. The European Commission’s Blue Guide explains this distinction clearly.

Tip two: inspect ISO 9001 controls behind the machine. Ask for inspection records, calibration dates, nonconformity reports, and corrective-action evidence. ISO’s 2023 Survey recorded more than 1.2 million ISO 9001 certificates worldwide. Certification alone proves little, however. The process records matter more. Tip three: calculate total energy use per finished sheet, including warm-up, standby, and compressed air. The International Energy Agency’s Energy Efficiency 2023 report identifies industry as responsible for about 37% of global final energy demand.

Tip four: measure actual output during a witnessed trial. Record flute profile, adhesive spread, line speed, rejects, and restart time. A promised speed is not production evidence. Tip five: compare annual savings with purchase, installation, training, maintenance, and disposal costs. I would also challenge optimistic payback claims. They often exclude downtime and changing paper grades. Use three months of plant data where possible. A simple spreadsheet can expose weak assumptions, but it cannot replace a safety review. Inspect guards, emergency stops, interlocks, noise levels, and operator access before approving the investment.

5 Tips for Choosing an Automatic Flute Laminator: Safety, Compliance, and ROI

This procurement scorecard emphasizes the evidence that should be reviewed before purchasing an automatic flute laminator. CE conformity requires applicable EU safety assessment and technical documentation; ISO 9001 focuses on controlled processes, documented information, monitoring, and continual improvement. Energy use should be evaluated through measured consumption, operating hours, and expected output rather than nameplate power alone. The percentages are neutral audit weightings for comparison and are not company or brand data.

FAQS

Which flute thicknesses should an automatic laminator handle?

Confirm the required E flute range of 1–1.8 mm and B flute range of 2.2–3.5 mm. Test both extremes. Different thicknesses change feeding, pressure, glue control, and stacking stability.

Why is adjustable nip pressure important?

Thin E flute can crush under excessive pressure. B flute usually needs firmer, steadier contact. Adjustable pressure helps protect the board during mixed production.

What changeover time is practical?

A changeover under 15 minutes can be a useful target. Actual results depend on operators, board moisture, and machine settings. Targets can mislead.

How should registration accuracy be tested?

Use printed sheets with windows, folds, or alignment marks. Check movement at different speeds and sheet sizes. Small offsets can spoil folding accuracy and increase waste.

What glue problems should operators watch for?

Excess adhesive may soften thin flute board and cause curling. Too little adhesive can create lifted edges or weak bonding. Inspect bubbles, slipping, and uneven glue lines.

Should rated speed be trusted?

Treat the rated 150 m/min as a reference, not a guarantee. Test speed with normal board, adhesive, sheet sizes, and production loads. Empty-machine speed proves little.

Which sheet sizes should be checked before purchase?

Measure the smallest and largest sheets used in daily production. Wide sheets may run well while narrow pieces feed poorly. Small formats matter.

Which paperboard GSM limits need confirmation?

Confirm minimum and maximum GSM for both liner and corrugated board. Use your usual flute type, adhesive, and sheet dimensions during trials. Supplier data helps, but production evidence is stronger.

What production records should be kept during trials?

Record speed, pressure, temperature, moisture, sheet warp, and reject rates. Repeat tests on different days. Results can vary. My own tests would not be perfect, because humidity and operator habits affect outcomes.

Conclusion

Choosing an Automatic Flute Laminator starts with defining the board types and production goals. Confirm that the equipment can handle the required FEFCO flute profiles, such as E flute at approximately 1–1.8 mm and B flute at 2.2–3.5 mm. Set clear performance targets, including output near 10,000 sheets per hour and register accuracy within ±1 mm. These specifications help ensure stable quality and efficient operation across regular production runs.

Glue control is equally important. Look for a system that can maintain starch application around 2–5 g/m² while keeping viscosity stable. Check the compatible sheet range, line speed up to 150 m/min, maximum format, and paperboard GSM limits before making a decision. Finally, review CE conformity, ISO 9001-based quality controls, operator safety features, maintenance requirements, and energy consumption. A balanced assessment of productivity, reliability, and long-term operating costs will support a practical return on investment.


Ethan

Ethan

Ethan is a seasoned marketing professional with a deep expertise in our company's innovative product line. With a passion for sharing knowledge and insights, he takes the lead in regularly updating our corporate blog, where he explores industry trends, product features, and effective marketing......